- Published on
Receiving Webhooks with Netlify Functions
- Authors

- Name
- Ken Ruf
Svix is the enterprise ready webhooks sending service. With Svix you can build a secure, reliable, and scalable webhooks service in minutes, so you can focus on your business.
This tutorial demonstrates how to receive Webhooks from Svix or anyone using Svix to power its webhook service (Svix customers) by creating a webhook endpoint with Netlify Functions and verifying the webhook signature with the open source Svix libraries.
Receiving webhooks 101
Webhooks are how services notify each other of events. At their core they are just a POST request to a predetermined endpoint. You normally would want to use one function per service, and that function will listen to all of the event types. For example, if you receive webhooks from Example Inc., you can structure your URL like:
https://www.example.com/webhooks/stripe
The way to indicate that a webhook has been processed is by returning a 2xx (status code 200-299) response to the webhook message within a reasonable time-frame. It's also important to disable CSRF protection for this endpoint if the framework you use enables them by default.
Additionally, because of the way webhooks work, attackers can impersonate services by simply sending a fake webhook to an endpoint. Think about it: it's just an HTTP POST from an unknown source. This is a potential security hole for many applications, or at the very least, a source of problems. This is why most webhook implementations sign their messages, so those can be verified by the receivers.
In this tutorial we'll go through how to set up a webhook endpoint with Netlify Functions that will verify the webhook signature.
Receiving webhooks with Netlify Functions
We started with the default next-netlify-starter app and added the default path for Netlify Functions into our project. Then we added a file for the function that will handle the incoming webhooks and named it "webhook-receiver.js".
The specifics of this next step will vary from provider to provider but the basic idea is to calculate the expected signature and compare it to the signature provided in the webhook message.
Verifying webhook signatures
If you haven’t worked with webhook signatures before, verifying them manually can be a pain. There are several common failure modes in creating the signed content and calculating the signature with HMAC and SHA256. To make things easier, Svix offers a set of libraries to verify the signatures automatically.
First step is to install the Svix JavaScript (TypeScript) library (we have many other libraries that you can find on our Github repository):
npm install svix
// or
yarn add svix
We then need to import the Webhook class from the Svix library and set the secret to our environment variable:
import { Webhook } from "svix";

const secret = process.env.REACT_APP_SVIX_SECRET
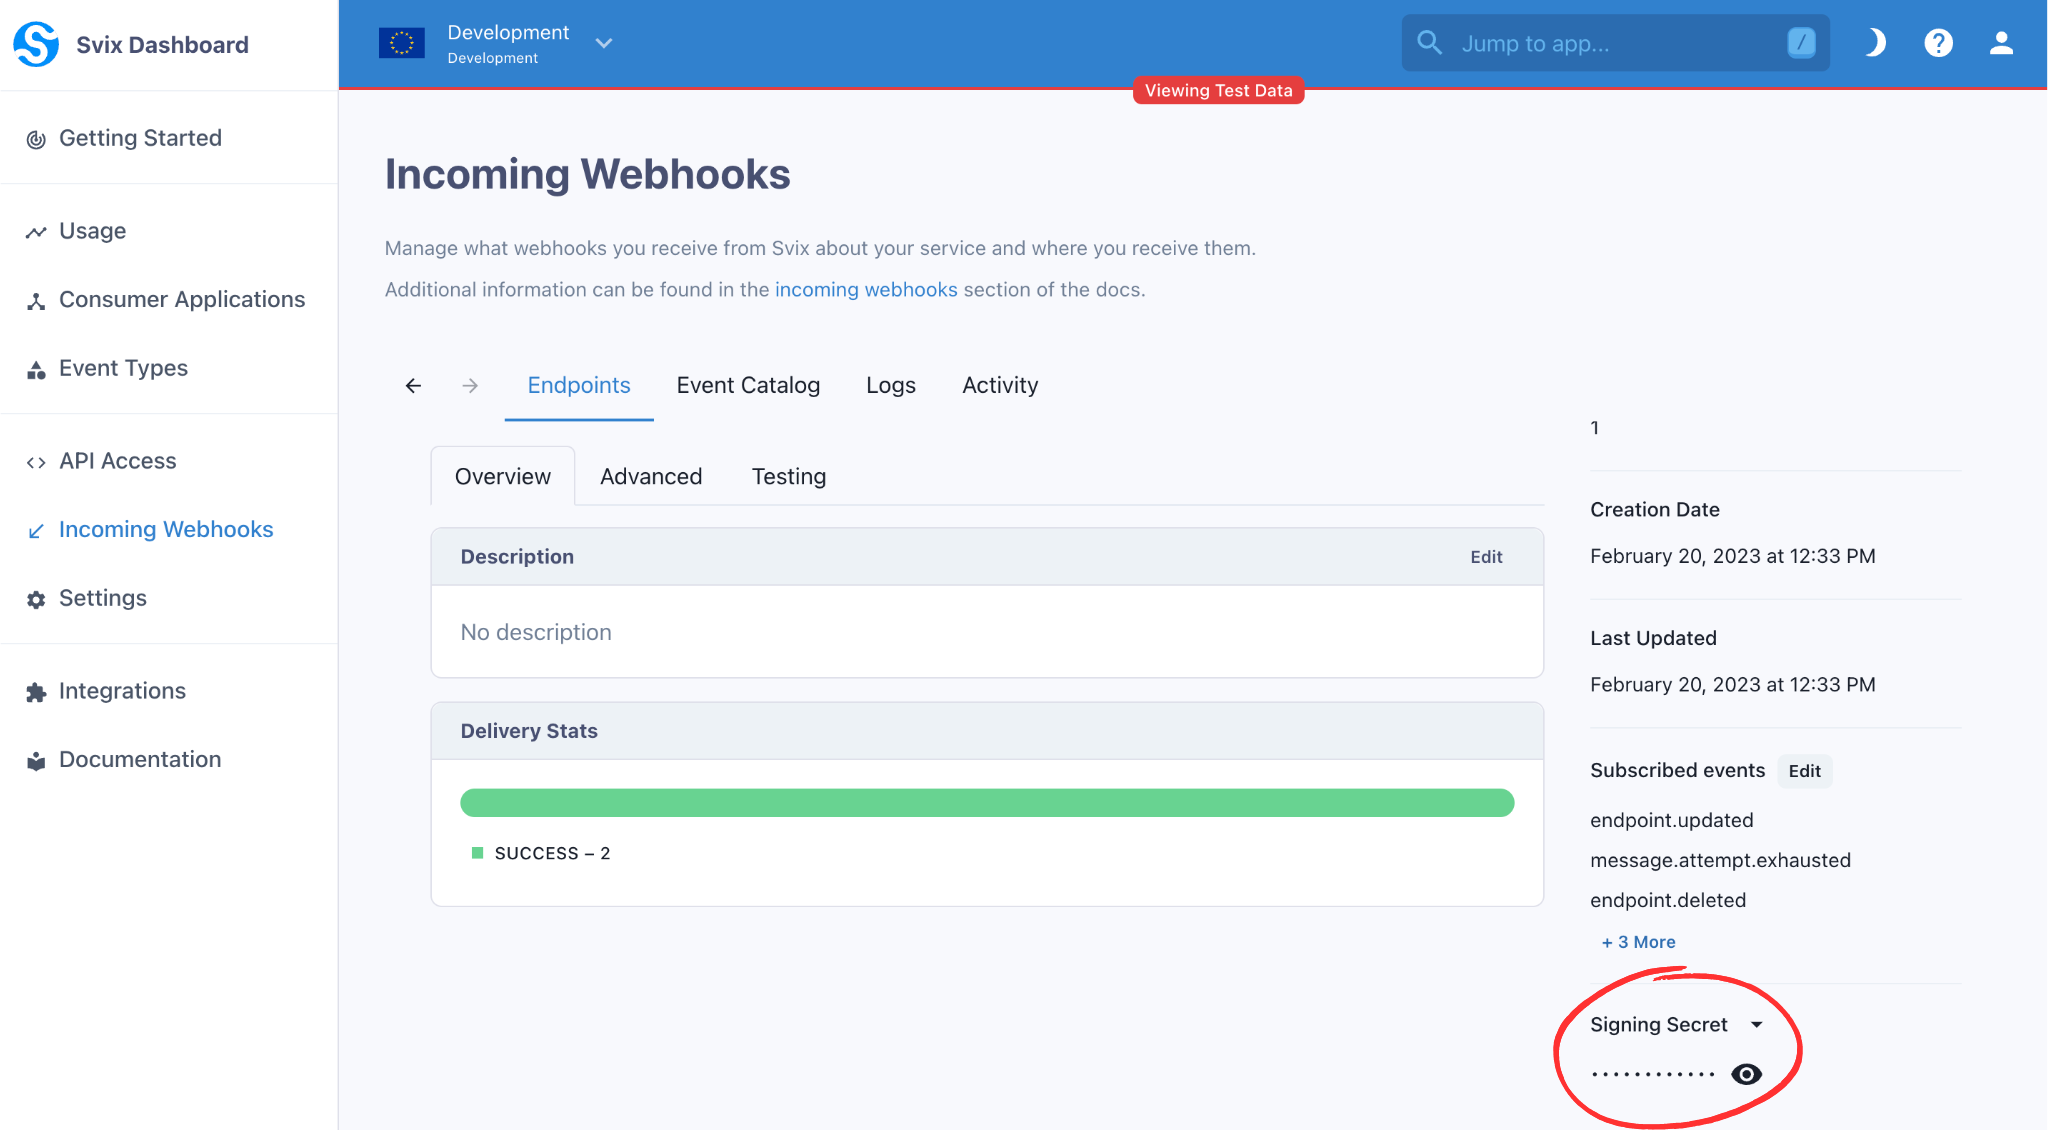
The signing secret can be found from the application portal. This page may look different depending on the customizations done by Svix customers, but it’s almost always in the endpoint editing page, for example:
Once you’ve grabbed your signing secret from Svix, you can head over to your project in Netlify and navigate to your site settings to add an environment variable. In Netlify, if you’re building using React, your variable names need to start with “REACTAPP”.
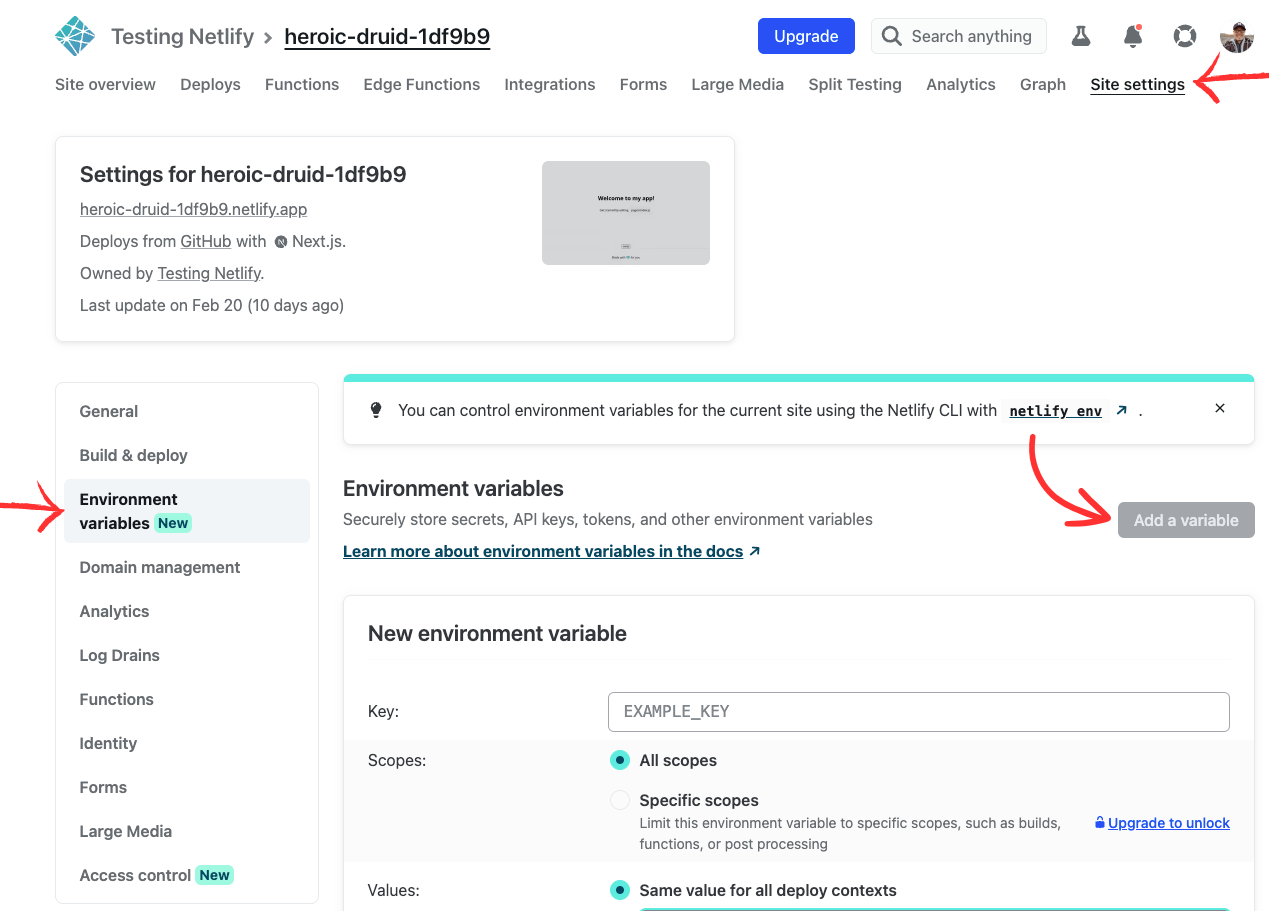
Enter your variable name as the key (“REACT_APP_SVIX_SECRET” for this example) and your endpoint’s signing secret from Svix as the value and create your environment variable.
Now we can use the Webhook class and the .verify() method to verify the signature:
export const handler = async ({body, headers}) => {
    const payload = body;
    const webhook = new Webhook(secret);
    let message;

    try {
        message = webhook.verify(payload, headers);
    } catch (err) {
        res.status(400).json({message: "Verification Failed"});
    }

    console.log("Signature Verified");

    res.status(200).json({
        message: "Signature Verified"
    });
}
And that's it! The Webhook class and .verify() method take care of the decoding/encoding and string manipulations that you would normally have to do yourself. This helps eliminate the most common failure modes and makes it really easy to verify the signature.
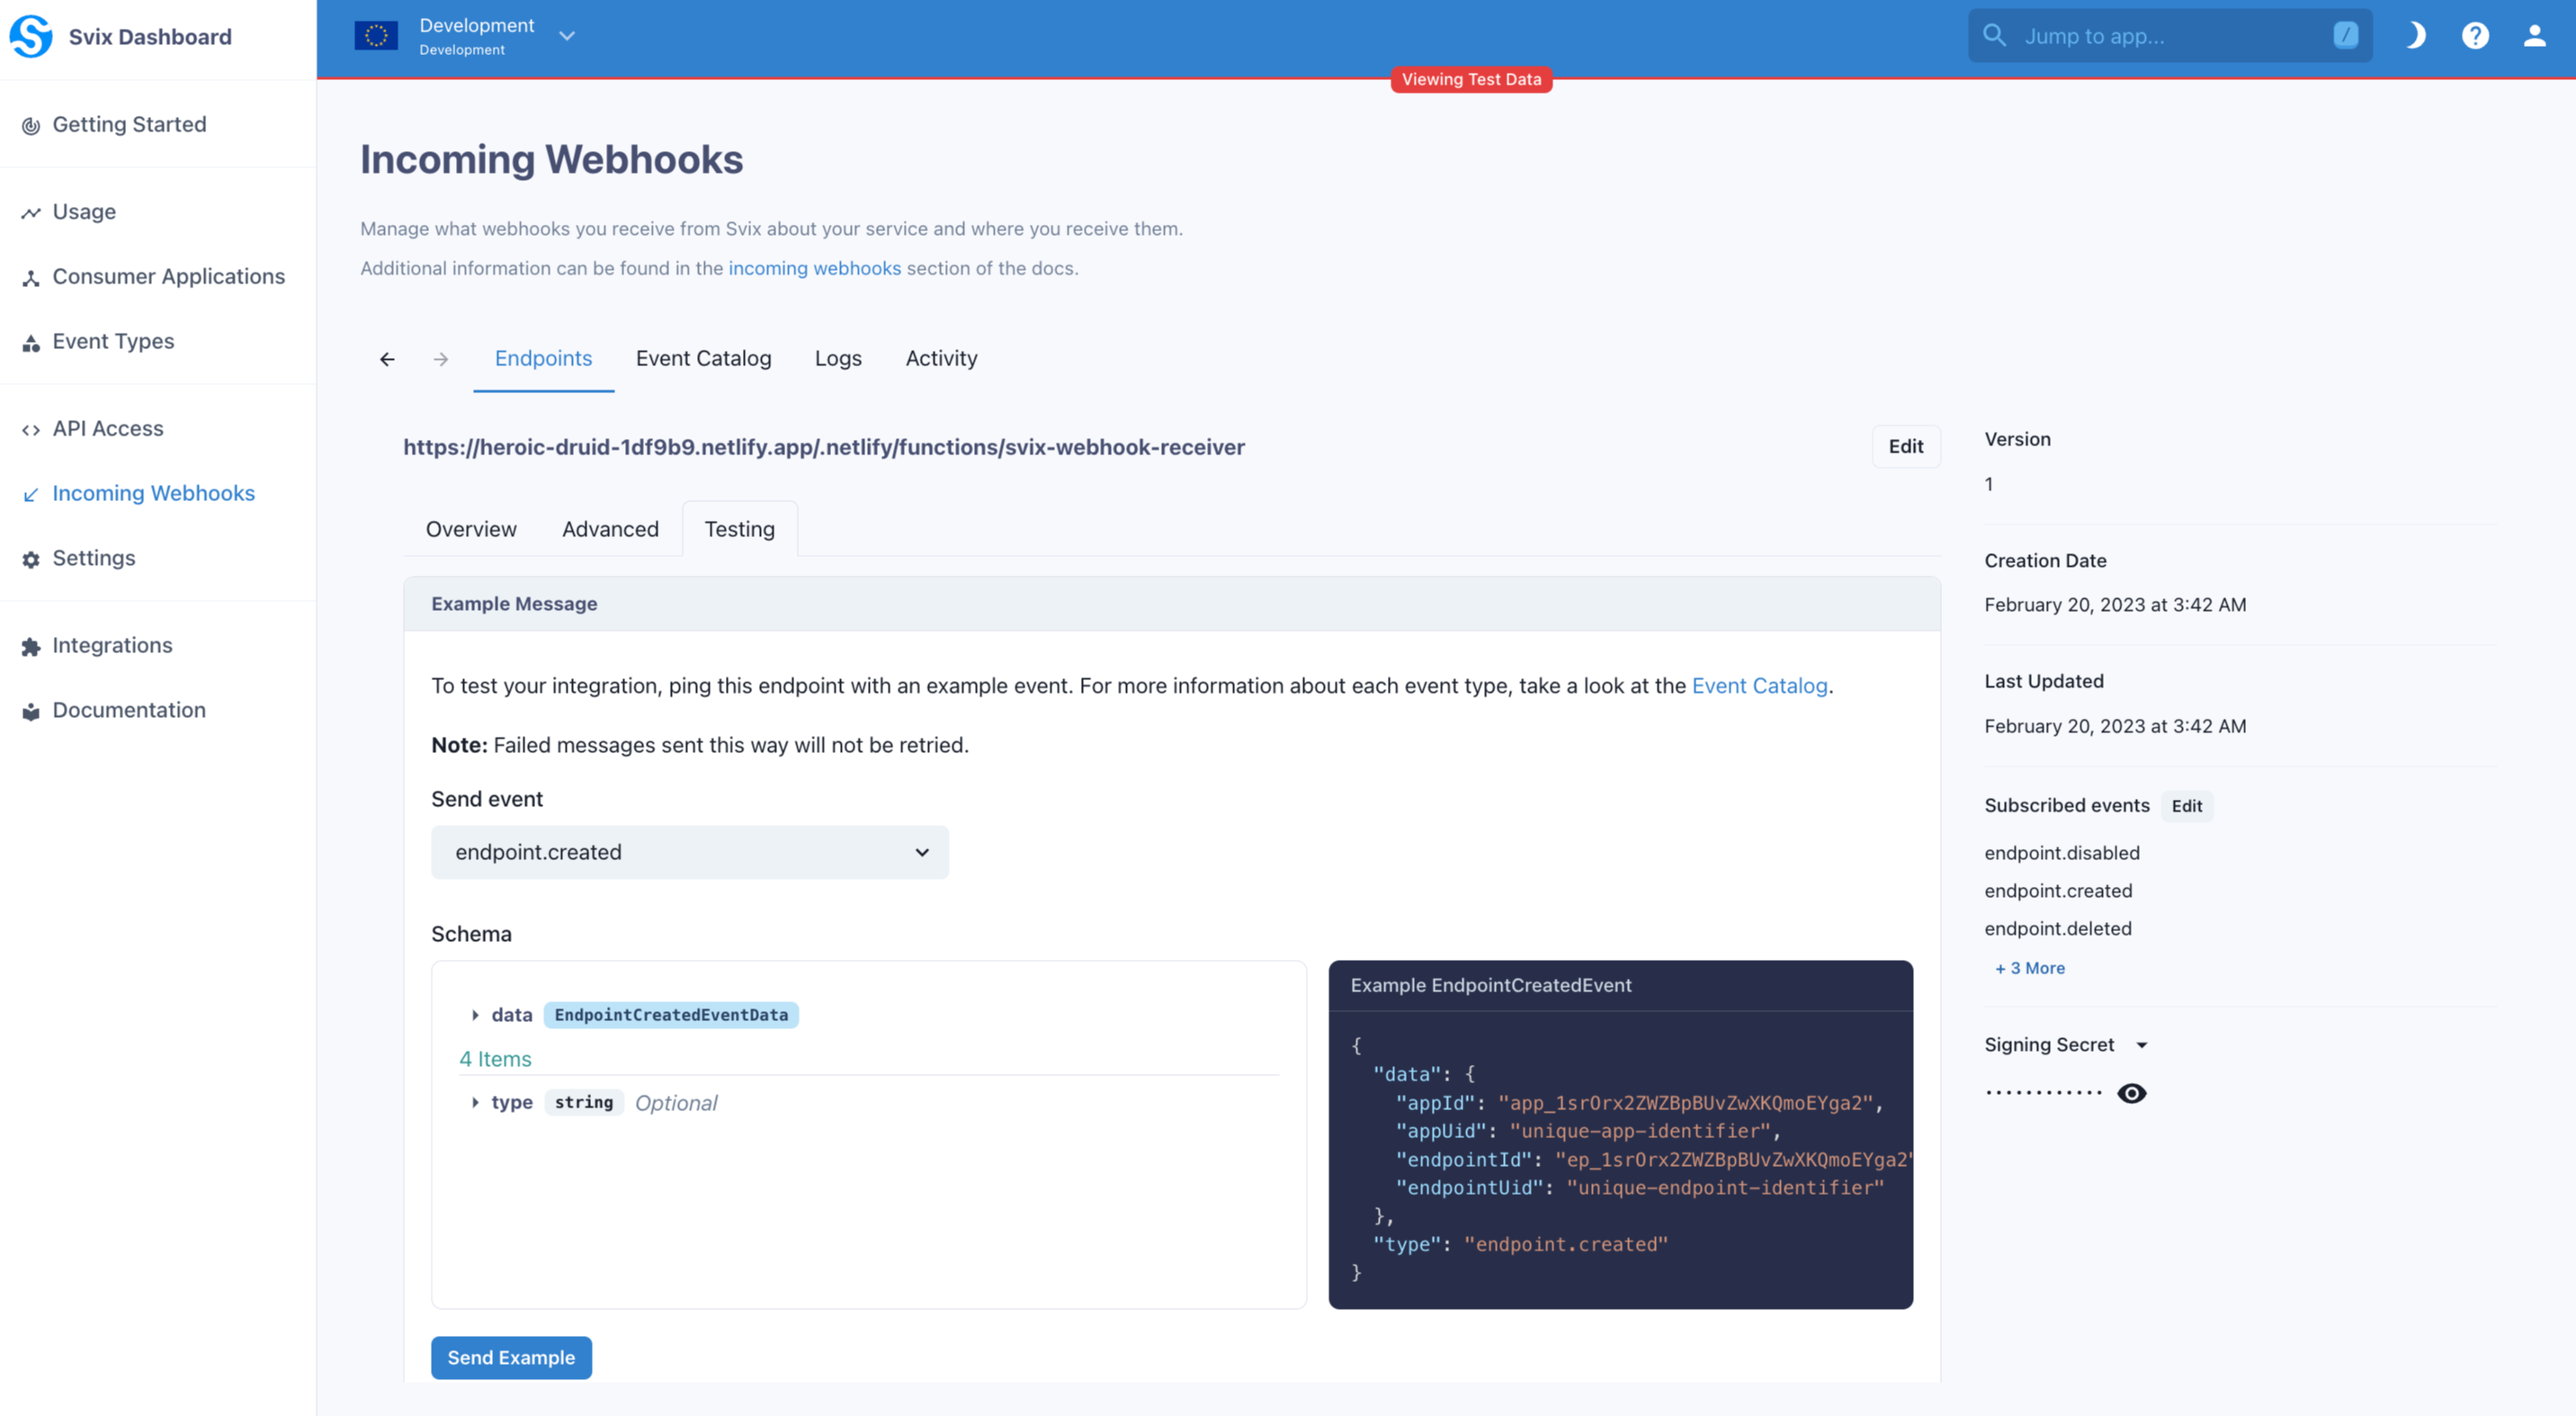
We can test our Netlify Function by sending the endpoint a message.
You can easily send an example message for testing in the Svix application portal:
We can see when we check the logs for the Netlify function that the webhook was sent to the endpoint and that the signature was verified successfully!

Summary
In this tutorial we showed how to easily verify a Svix webhook using a Netlify Function. Verifying webhook signatures is an essential step for webhook security, and while it can be daunting at first, with the right libraries and instructions, it’s a breeze.